In the digital age, the power to create cinematic magic lies not just in Hollywood studios, but also in the palm of your hand. With the advent of smartphones and advanced camera technology, the world of video production has democratized, opening doors for aspiring filmmakers to tell their stories with professional-quality results. But the question remains: how does one transform a simple smartphone into a powerful tool for video production? This article, ‘From Smartphone to Cinema: A Beginner’s Guide to Professional-Quality Video Production’, is here to guide you through this exciting journey, promising to equip you with the techniques and knowledge to elevate your smartphone filmmaking to new heights.
Did you know that the first Academy Award for Best Picture, ‘Wings’, was made with a budget of $388,000 in 1927? Today, with a smartphone and the right techniques, you can create a film with a fraction of that cost, reaching audiences worldwide. The purpose of this article is to bridge the gap between your smartphone and the silver screen, helping you understand the fundamentals of professional video production and how to apply them using your smartphone.
By the end of this guide, you will gain a solid understanding of professional techniques such as composition, lighting, sound recording, and editing. You will learn how to make the most of your smartphone’s camera, and how to use affordable accessories and apps to enhance your filmmaking experience. We will also delve into storytelling techniques, helping you craft compelling narratives that engage your audience.
So, whether you’re a curious beginner eager to explore the world of filmmaking, or an experienced videographer looking to harness the power of smartphone filmmaking, this article is your key to unlocking a new realm of creative possibilities. Let’s embark on this exciting journey together, as we transform your smartphone into a cinematic powerhouse.
Mastering Video Production Techniques with Your Smartphone
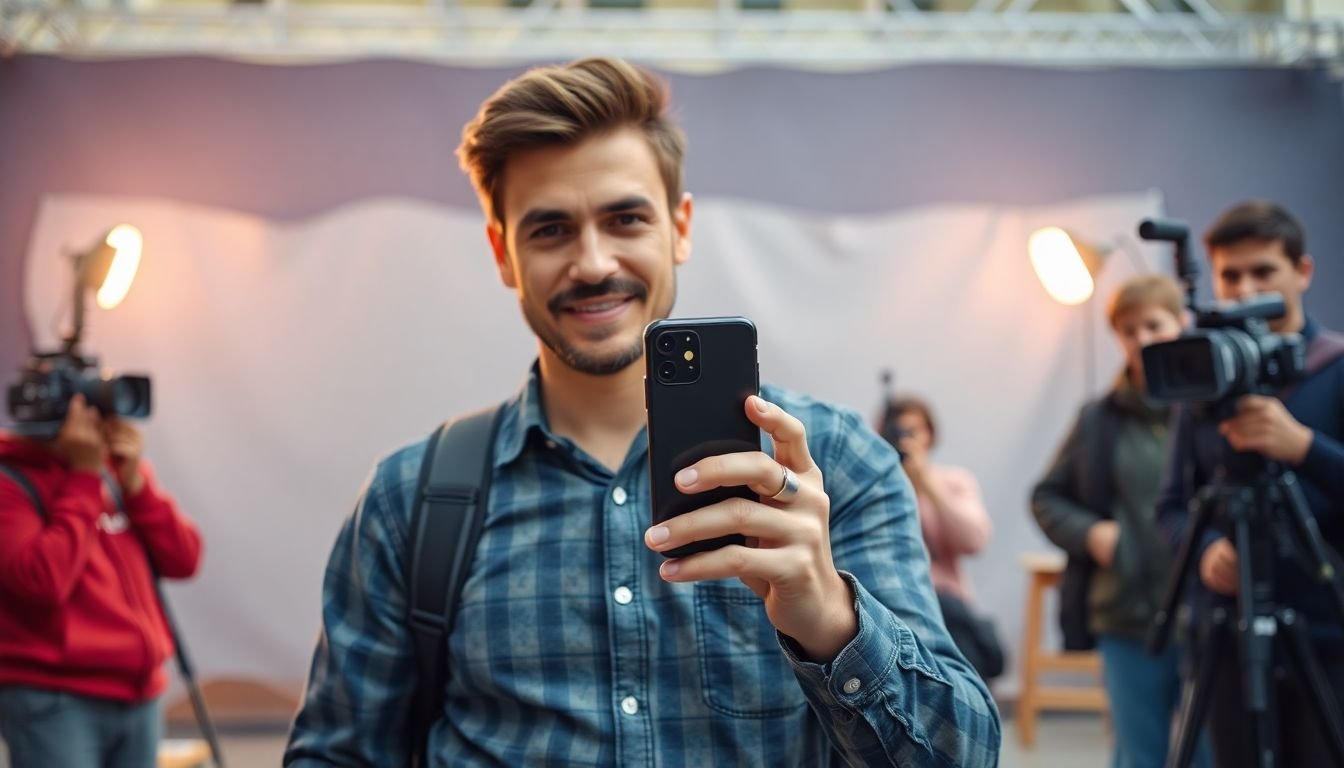
In the digital age, the power of video production has shifted into the palm of our hands. With a smartphone and a few creative techniques, you can now capture and edit stunning videos that rival professional productions. Imagine transforming your everyday moments into cinematic masterpieces, all without leaving home. This isn’t just about pointing and shooting; it’s about understanding light, composition, and storytelling. It’s about knowing how to use your phone’s camera settings to capture the perfect shot, and how to edit your footage to create a compelling narrative. It’s about mastering techniques like steady shots, smooth panning, and creative use of angles. It’s about understanding the art of videography and making it your own. So, are you ready to unlock the filmmaker within, armed with nothing but your smartphone and a world of creativity?

Understanding Video Production Basics
Video production, at its core, is a powerful medium for storytelling. It’s an art that combines creativity, technical skills, and strategic planning. Let’s delve into the fundamentals, focusing on storytelling, scriptwriting, and pre-production planning, and explore how these principles apply to smartphone filmmaking.
Storytelling is the heart of video production. It’s about crafting a narrative that resonates with your audience. A compelling story has a clear beginning, middle, and end, with a protagonist facing challenges and growing along the way. It’s not just about what happens, but why it happens and how it affects the characters.
Scriptwriting is the blueprint of your video. It translates your story into a visual medium. Here are some steps to help you write an effective script:
- Identify your target audience and tailor your story to them.
- Develop engaging characters with clear motivations.
- Craft a compelling narrative arc with a strong beginning, middle, and end.
- Use visual storytelling techniques, like shot types and camera angles, to enhance your story.
Pre-production planning is where you lay the groundwork for your video. It involves everything from concept development to scheduling and budgeting. Here’s a simple breakdown:
- Concept Development: Define your video’s purpose, target audience, and key message.
- Scriptwriting: Write your script, breaking it down into scenes and shots.
- Storyboarding: Create visual representations of your shots to plan your filming process.
- Scheduling: Plan your filming days, locations, and equipment needs.
- Budgeting: Determine your costs and secure necessary resources.
Now, let’s talk about smartphone filmmaking. With advancements in technology, smartphones have become powerful tools for video production. The principles of storytelling, scriptwriting, and pre-production planning still apply. Here’s how you can adapt them:
- Storytelling: Keep your story simple and engaging. Use the strengths of smartphone filmmaking, like its intimacy and spontaneity, to your advantage.
- Scriptwriting: Write concise, visual scripts that play to the strengths of smartphone cameras. Use close-ups and natural lighting to create compelling visuals.
- Pre-production Planning: Plan your shots, locations, and equipment (like lenses, tripods, and stabilizers) carefully. Consider using apps and accessories to enhance your smartphone’s capabilities.
With these fundamentals in mind, you’re ready to start your video production journey, whether you’re using a high-end camera or a smartphone.

Choosing the Right Smartphone and Accessories
Embarking on a quest to capture cinematic moments? The journey begins with selecting the perfect smartphone for video production. With a plethora of options available, it’s crucial to consider key features that will elevate your videography experience.
Firstly, let’s zoom in on the camera. A smartphone’s camera quality is the lens through which your stories will be told. Look for a device with a high megapixel count, but remember, it’s not just about numbers. Consider the aperture, which determines how much light the lens can capture, and the dynamic range, which ensures your videos have rich, vibrant colors and details.
Next, let’s talk about battery life. Video production can be a marathon, not a sprint. You’ll need a smartphone that can keep up with your creative pursuits. Opt for a device with a large battery capacity and fast charging capabilities.
Storage is another critical aspect. Videos can consume a significant amount of space, so ensure your smartphone has ample built-in storage or the option to expand it with a microSD card.
Now, let’s explore the essential accessories that can transform your smartphone into a professional video production powerhouse.
- Lenses: Enhance your smartphone’s camera capabilities with lenses that offer different perspectives. From wide-angle to telephoto, these accessories allow you to capture a variety of shots.
- Stabilizers: Say goodbye to shaky footage with stabilizers that keep your shots smooth and steady. Gimbals are a popular choice, offering 3-axis stabilization for cinematic-like videos.
- Microphones: Capture crystal-clear audio with external microphones that reduce background noise and enhance the quality of your recordings.
With the right smartphone and accessories, you’re ready to step into the director’s chair and create videos that will captivate your audience.

Mastering Smartphone Camera Settings
Embarking on a journey to elevate your smartphone photography? Let’s dive into the world of manual controls, where you’ll gain the power to manipulate focus, exposure, and white balance, transforming your device into a professional-grade camera.
First, let’s understand why mastering these settings is crucial. Smartphones, with their advanced AI, often overprocess images, leading to loss of detail and unnatural results. By taking control, you’ll capture images that truly reflect your artistic vision.
Manual Focus: The Eye of the Camera
To manually control focus, tap and hold on your screen where you want the camera to focus. A sun icon or AF/AE-Lock button will appear. Tapping this icon locks the focus, allowing you to recompose your shot while maintaining that focus point. This is particularly useful when shooting macro or low-light scenes where autofocus struggles.
Exposure: The Soul of the Image
Exposure determines how light or dark your image appears. To manually control exposure, tap and hold on your screen, then drag the sun icon up or down to adjust the exposure value (EV). A higher EV value makes the image brighter, while a lower value darkens it. Experiment with different EV values to achieve the mood you desire.
White Balance: The Color of Reality
White balance ensures your images appear natural and true to life. Smartphones often struggle with this in challenging lighting conditions. To manually adjust white balance, look for a WB icon in your camera settings. Swipe through the presets (like Tungsten, Fluorescent, etc.) to see how they affect the color cast. Alternatively, use the color temperature slider to manually set the white balance.
Practice these techniques, and soon you’ll be capturing professional-looking footage with your smartphone. The key is patience and experimentation. So, go forth, explore, and let your creativity shine!

Lights, Camera, Action: Shooting Techniques
In the world of smartphone photography, the mantra ‘Lights, Camera, Action’ takes on a new meaning. With the right techniques, your smartphone can become a powerful storytelling tool, capable of capturing cinematic shots that rival those of professional cameras. Let’s delve into some smartphone-specific shooting techniques that will help you achieve stunning, dynamic images with limited equipment.
The first step in capturing a compelling shot is framing and composition. Unlike traditional cameras, smartphones don’t have viewfinders, so you’ll need to rely on your phone’s screen. Use the gridlines in your camera settings to divide your frame into thirds, both horizontally and vertically. This rule of thirds helps create balanced and interesting compositions by placing your subject off-center. Another useful technique is to use leading lines, such as roads, fences, or shadows, to draw the viewer’s eye into the frame and towards the main subject.
Now, let’s talk about movement. Smartphones are perfect for capturing action and motion. To freeze movement, use a fast shutter speed. Most smartphones allow you to adjust this setting, or you can use a sports mode if available. For a more creative approach, try panning with your subject. This involves moving your phone at the same speed as the subject while keeping it in focus, resulting in a blurred background and a sharp, moving subject.
To achieve a cinematic look, consider using different angles and perspectives. Get low to the ground for a worm’s-eye view, or find a high vantage point for a bird’s-eye view. Close-ups can add intimacy and detail, while wide-angle shots can convey a sense of scale and grandeur. Don’t be afraid to experiment with different angles and perspectives to create a dynamic and engaging visual story.
Lastly, pay attention to lighting. Smartphones struggle in low-light conditions, so try to shoot in natural light whenever possible. Backlighting can create a dramatic effect, but be careful not to overexpose your subject. Use the HDR (High Dynamic Range) setting on your phone to balance out bright and dark areas in your frame.
With these techniques in your arsenal, you’re ready to capture cinematic shots with your smartphone. So, grab your phone, step out into the world, and let the ‘Lights, Camera, Action’ begin!

Audio Recording for Smartphone Filmmakers
In the realm of smartphone filmmaking, the importance of quality audio often takes a backseat to the visuals, but it’s a critical element that can make or break your production. High-quality audio immerses your audience, enhances storytelling, and elevates your film’s professionalism. So, let’s dive into the world of smartphone audio recording and explore techniques to capture and sync audio like a pro.
First, understand that your smartphone’s built-in microphone, while convenient, isn’t designed for high-quality audio recording. It’s omnidirectional, meaning it picks up sound from all directions, which can lead to background noise and poor audio quality. To combat this, consider investing in an external microphone. There are several types, but lapel microphones and shotgun microphones are popular choices for smartphone filmmakers.
Lapel microphones, also known as lav mics, are small, clip-on microphones that can be hidden on your subject’s clothing. They’re ideal for interviews and dialogue scenes, capturing clear, up-close audio. Shotgun microphones, on the other hand, are designed to pick up sound from a specific direction, making them great for recording dialogue from a distance or capturing ambient sounds.
Once you’ve chosen your microphone, it’s time to connect it to your smartphone. Most external microphones connect via the headphone jack or a Lightning connector, depending on your smartphone’s model. Some microphones may require an adapter or an app to function properly.
Now, let’s talk about apps. While your smartphone’s default camera app can record audio, dedicated audio recording apps offer more control and better quality. Apps like Ferrite Recording Studio, Hi-Q MP3 Voice Recorder, or Auphonic Record provide features like adjustable recording quality, noise reduction, and even basic editing tools.
When recording, ensure your microphone is as close to the sound source as possible to minimize background noise. Also, monitor your audio levels to prevent distortion. Most apps have a visual indicator to help you maintain optimal levels.
Finally, let’s discuss syncing audio with video in post-production. This step is crucial for ensuring your audio and video are in sync, especially if you’re using an external microphone. Here are the steps:
- Record a short burst of loud, distinct sound (like clapping or a tone) at the beginning of your video and audio recording. This will serve as a sync point.
- Import your video and audio files into your editing software. Most software, like iMovie, Adobe Premiere Pro, or Final Cut Pro, have an audio sync feature.
- Use the sync point to align your audio and video. Your software should automatically adjust the audio to match the video.
- Review your work and make any necessary adjustments.
Syncing audio and video might seem daunting at first, but with practice, it becomes second nature. And remember, quality audio is a game-changer. It’s worth the extra effort to ensure your smartphone films sound as good as they look.

Storytelling with Mise-en-Scène
In the realm of smartphone filmmaking, storytelling isn’t confined to scripts and dialogue alone. Mise-en-scène, a French term that translates to ‘putting on stage,’ is a powerful tool that allows you to tell your story through what you choose to include within the frame. This cinematic technique, when mastered, can elevate your smartphone films from simple recordings to immersive narratives.
The first step in harnessing the power of mise-en-scène is to consider the props in your scene. Props are not just objects, but storytellers in their own right. They can reveal character, advance plot, or evoke emotion. For instance, a worn-out photograph can hint at a character’s past, while a mysterious letter can foreshadow an upcoming revelation. To incorporate props effectively, ask yourself: what objects can help convey the story, theme, or mood I’m aiming for?
Costumes, another crucial element of mise-en-scène, can also speak volumes about your characters. They can signify social status, personality, or even hint at a character’s arc. For example, a character who starts in casual clothes but gradually dons more formal attire might be indicating a transformation or growth. When planning costumes, think about how your characters’ attire can reflect their identities and journeys.
Set design is the final piece of the mise-en-scène puzzle. The environment in which your story unfolds can greatly influence its tone and themes. A dimly lit, cluttered room might suggest a character’s inner turmoil, while a lush, green forest could symbolize hope or rebirth. To create compelling sets, consider the mood you want to evoke and how the environment can support or enhance your story.
Remember, every element in your frame should serve a purpose. It’s not about cramming in as many details as possible, but rather about using details strategically to tell your story. So, the next time you’re planning a scene, take a moment to consider the mise-en-scène. What can you include in the frame to make your story more engaging, more resonant, more… you?
In conclusion, mise-en-scène is a versatile tool that can help you create visually compelling and narratively rich smartphone films. By thoughtfully incorporating props, costumes, and set design, you can turn your frame into a stage that brings your story to life.

Editing like a Pro on Your Smartphone
In the palm of your hand lies a powerful tool for cinematic storytelling
- your smartphone. Gone are the days when high-quality video editing was the preserve of expensive software and bulky computers. Today, there’s a plethora of powerful video editing apps designed specifically for smartphones, democratizing filmmaking like never before. Let’s dive into some of these apps and explore how you can harness their power to edit like a pro on your smartphone.
One such app is ‘Adobe Premiere Rush’, a streamlined version of Adobe’s professional editing software. It offers features like auto-ducking for audio, color correction tools, and even a built-in camera to capture and edit footage simultaneously. Another standout app is ‘iMovie’ for iOS users, which offers a user-friendly interface and features like split-screen, green-screen, and advanced titling tools. For Android users, ‘FilmoraGo’ is a robust option, offering features like keyframe animation, color correction, and a vast library of effects and music.
Now, let’s discuss some editing techniques that you can apply using these apps. The ‘180-degree rule’ is a fundamental concept in filmmaking that helps maintain spatial orientation. Imagine a line drawn between two subjects in a scene
- typically the interviewer and interviewee. The camera should not cross this line to avoid disorienting the viewer. In your smartphone editing, you can ensure this by keeping the subject’s position consistent in each shot.
‘Match cuts’ are a powerful tool for creating visual rhymes and maintaining rhythm. This involves matching the action in one shot with the composition of another. For example, a shot of a person’s hand holding a knife can be matched with a shot of a hand holding a pen, creating a visual pun. In your smartphone edits, you can create match cuts by carefully framing and composing your shots.
Rhythm is another crucial aspect of editing. It’s about creating a visual beat, a pulse that drives your story forward. This can be achieved through the use of jump cuts, where a single action is broken up into multiple shots to create a sense of speed or energy. It can also be achieved through the use of music and sound effects, which can be easily added and synced in most smartphone editing apps.
So, go ahead, pick up your smartphone, and start editing like a pro. With the right app and a bit of creativity, you too can create compelling, cinematic stories that will captivate your audience.

Color Grading and Sound Design for a Cinematic Touch
Elevating smartphone videos to a professional level is no longer a pipe dream, thanks to the power of color grading and sound design. These two techniques, when mastered, can transform your ordinary videos into cinematic masterpieces. Let’s dive into each of these techniques and explore the apps and tools that can help you achieve these effects.
Color Grading: The Paintbrush of Cinema Color grading is the process of altering and enhancing the colors in your video to evoke a specific mood or atmosphere. It’s like painting with light, giving your videos a unique visual identity. Here are some techniques and apps to help you get started:
- Understanding the Color Wheel: Familiarize yourself with the color wheel to understand how different colors evoke different emotions. Warm colors like red, orange, and yellow can create a cozy, intimate atmosphere, while cool colors like blue and green can evoke a sense of calm or mystery.
- Apps for Color Grading:
- LumaFusion: This powerful video editing app for iOS offers advanced color grading tools, including color curves, color wheels, and LUTs (Look-Up Tables) to help you achieve that cinematic look.
- Adobe Premiere Rush: Available on both iOS and Android, Premiere Rush offers a simplified version of Adobe’s professional color grading tools, making it easy to add that professional touch to your videos.
- Cinema FV-5: This Android app offers manual controls for color grading, allowing you to adjust ISO, shutter speed, and white balance to capture and grade your videos like a pro.
Sound Design: The Symphony of Cinema Sound design is the art of creating and manipulating sound to enhance the storytelling in your videos. It’s not just about adding music; it’s about creating an immersive audio experience that engages your audience on a deeper level. Here are some techniques and apps to help you achieve this:
- Understanding Frequency Ranges: Different frequencies evoke different emotions. Low frequencies can create a sense of power or tension, while high frequencies can evoke a sense of energy or alertness. Use this knowledge to create soundscapes that complement your video’s narrative.
- Apps for Sound Design:
- Audacity: This free, open-source audio editor is available on multiple platforms and offers a wide range of tools for recording, editing, and manipulating sound. It’s a great starting point for anyone interested in sound design.
- iZotope RX: This professional audio repair and enhancement suite offers tools for removing noise, fixing dialogue, and designing sound effects. It’s a powerful tool for anyone looking to take their sound design to the next level.
- GarageBand: This user-friendly app, available on iOS and macOS, offers a wide range of tools for creating and manipulating sound. It’s a great starting point for anyone interested in sound design and music composition.
Combining Color Grading and Sound Design The real magic happens when you combine color grading and sound design. By synchronizing your visuals and audio, you can create a powerful, immersive experience that engages your audience on a deeper level. Don’t be afraid to experiment with different techniques and tools to find what works best for your unique vision.
So, grab your smartphone, and let’s get started! With the right techniques and tools, you too can create cinematic masterpieces that will captivate your audience and leave them wanting more.

Sharing and Monetizing Your Smartphone Films
In the digital age, smartphones have democratized filmmaking, allowing anyone to capture and share their unique perspective with the world. If you’re one of the many talented individuals creating captivating videos on your smartphone, you might be wondering how to share your work and potentially monetize it. This guide will walk you through the process, from exporting your videos to sharing them on various platforms, and discuss strategies to grow your audience and explore monetization opportunities.
First, let’s talk about exporting your videos. Most smartphones support popular video formats like MP4, but it’s essential to ensure your videos are compatible with the platforms you plan to share them on. For instance, Instagram prefers videos in MP4 format with an aspect ratio of 1:1 or 4:5 for feed posts and 9:16 for stories. Meanwhile, YouTube supports a wide range of formats, including MP4, MOV, and AVI. Always check the specific requirements of the platform you’re targeting.
Once your videos are exported, it’s time to share them. There are numerous platforms where you can showcase your work, each with its unique audience and features. Here are a few popular options:
- YouTube: The world’s largest video-sharing platform, YouTube offers a vast audience and numerous monetization opportunities, including ad revenue, channel memberships, merchandise shelf, and Super Chat.
- Instagram: This photo-sharing app has evolved into a significant platform for short videos, with features like IGTV, Reels, and Stories. Instagram offers in-app shopping, branded content tools, and badges for monetization.
- Vimeo: A professional video platform, Vimeo offers advanced privacy settings, customizable player, and analytics tools. While it doesn’t have built-in monetization features, you can use it to showcase your work and attract clients for paid projects.
- Facebook: With over 2 billion monthly active users, Facebook is an extensive platform for sharing videos. It offers in-stream ads, fan subscriptions, and branded content for monetization.
Before you start sharing your videos, it’s crucial to understand copyright laws. Ensure that you have the rights to use any music, images, or other copyrighted material in your videos. If you’re using someone else’s work, consider using royalty-free music or obtaining proper licensing and permissions.
Growing an audience takes time, effort, and strategy. Here are some best practices to help you build a following:
- Consistency is key. Upload videos regularly to keep your audience engaged and attract new viewers.
- Find your niche. Identify what makes your videos unique and cater to that audience.
- Engage with your audience. Respond to comments, ask for feedback, and create a community around your content.
- Promote your videos. Share them on social media, collaborate with other creators, and use relevant hashtags to increase visibility.
- Analyze your performance. Use platform analytics tools to understand what’s working and what’s not, and adjust your strategy accordingly.
Monetizing your smartphone films is an exciting prospect, but it’s important to remember that growing an audience and generating income takes time and dedication. Stay true to your creative vision, engage with your audience, and be patient. With the right strategy and a little bit of luck, you could turn your smartphone films into a successful and profitable venture.
FAQ
What is the difference between smartphone filmmaking and traditional video production?
Can I really achieve professional-quality videos with just a smartphone?
What are some essential accessories for smartphone filmmaking?
- Lenses: To capture wide-angle, macro, or telephoto shots.
- Stabilizers: Like gimbals or tripods, to keep your shots steady.
- Microphones: To capture clear audio, as smartphone microphones can be quite limited.
- Lighting: To control and enhance the lighting in your scenes.
- Power banks: To keep your smartphone charged throughout the shoot.
How can I achieve good audio quality with my smartphone?
- Use an external microphone: This can significantly improve the quality of your audio.
- Avoid wind: Use a windscreen or shoot in a sheltered location to minimize wind noise.
- Record in quiet environments: Try to avoid recording in noisy places.
- Monitor audio: Always listen to your audio while recording to ensure it’s clean and clear.
What are some professional techniques I can use to improve my smartphone filmmaking?
- Rule of Thirds: This composition technique helps create more dynamic and interesting shots.
- Storyboarding: Planning your shots before you start filming can help you stay organized and ensure you capture all the necessary footage.
- Three-Point Lighting: This is a basic lighting technique that can help you create mood and depth in your shots.
- Camera Movement: Using smooth, purposeful camera movements can add dynamics and energy to your videos.
- Depth of Field: Controlling your smartphone’s depth of field can help you create a sense of depth and draw attention to your subject.
How can I edit my videos to look more professional?
- Choose the right editing app: There are many powerful video editing apps available for smartphones, such as iMovie, Adobe Premiere Rush, and Filmic Pro.
- Use transitions and effects sparingly: Too many effects can make your video look amateurish. Stick to simple, tasteful transitions and effects.
- Match cuts: This technique involves matching the action in one shot to the action in the next shot, creating a smooth, professional-looking transition.
- Color grading: Adjusting the colors in your video can help create a consistent look and feel, and enhance the mood of your video.
How can I make my videos stand out from the crowd?
- Find your unique voice: What makes your videos unique? Is it your sense of humor, your storytelling style, or your perspective on the world?
- Tell a story: People connect with stories. Make sure your videos have a clear narrative, even if it’s just a short, simple story.
- Be creative: Don’t be afraid to experiment with different techniques, styles, and formats.
- Engage with your audience: Respond to comments, ask for feedback, and use that feedback to improve your videos.